Oriserve Application Setup
INTRODUCTION
This Document, explains about the steps that need to follow for OriServe application setup.
In this Doc,
- Bucketname : manjeet-test-ori
- BrandName: likith
- environment: Dev
- Modify the above values based on your brand.Above details are only for reference.
S3 BUCKET Modifications
Create the new brand under a reference bucket with appropriate nomenclature.
Copy the existing brand files in to new brand.
For Ex: Here newly created brand is
likithunder the reference bucketmanjeet-test-ori. Copied the brand files frompd1(you can do it from any brand)Download the
OCSenv from the bucket location/manjeet-test-ori/likith/Apptier/Environment/Development/and modify the below details according to your brand configuration and revert back to S3 same location.- SERVER_URL: brand-environment.oriserve.com
- CS_DB_USERNAME:
- CS_DB_PASSWORD:
- BrandName:
Download the
Usersenv from the bucket location/manjeet-test-ori/likith/Users/Environment/Development/and modify the below details according to your brand configuration and reupload to the S3 same location.- BrandName:
- MONGODB_USERNAME:
- MONGODB_PASSWORD:
Download the
Schedulersenv from the bucket location/manjeet-test-ori/likith/Schedulers/Environment/Development/and modify the below details according to your brand configuration and reupload to the S3 bucket:- BrandName:
- MONGODB_USERNAME:
- MONGODB_PASSWORD:
Modify the env file at location
manjeet-test-ori/likith/WebTier/Environment/Development/public url as your OCS url i.e,likith-dev-oriserve.com/chatbotModify the Dashboard env file at location
manjeet-test-ori/likith/WebTier/Environment/Development/Dashboard/"BASE_URL & SOCKET_URL".
AWS CONFIGURATION
- Create an instance for your brand of respective service with an instance type "t3a.small" (only for reference) with a nomenclature
brand-environment-Stack. - Ex:
tvs-dev-Fullstack - Make sure that created instance should have the below inbound rules and outbound rules as "ALL"
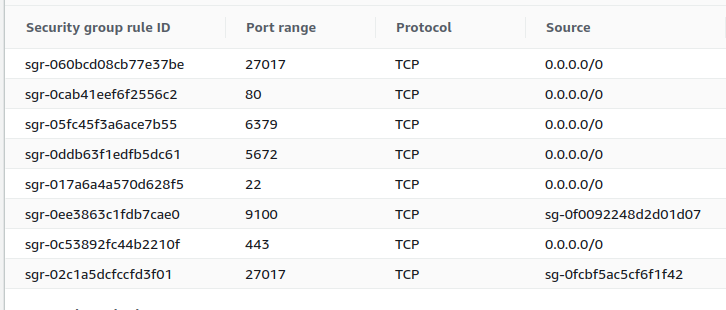
- Go to the
AWS Route53and select the zoneoriserve.com. - Create DNS records for chatbot and dashboards for your brand. Below SS is for your reference.
- For OCS:
brand-environment.domainname - For Dashboard:
brand-environment-dashboard.domainname - For Dashboard2:
brand-environment-dashboard2.domainname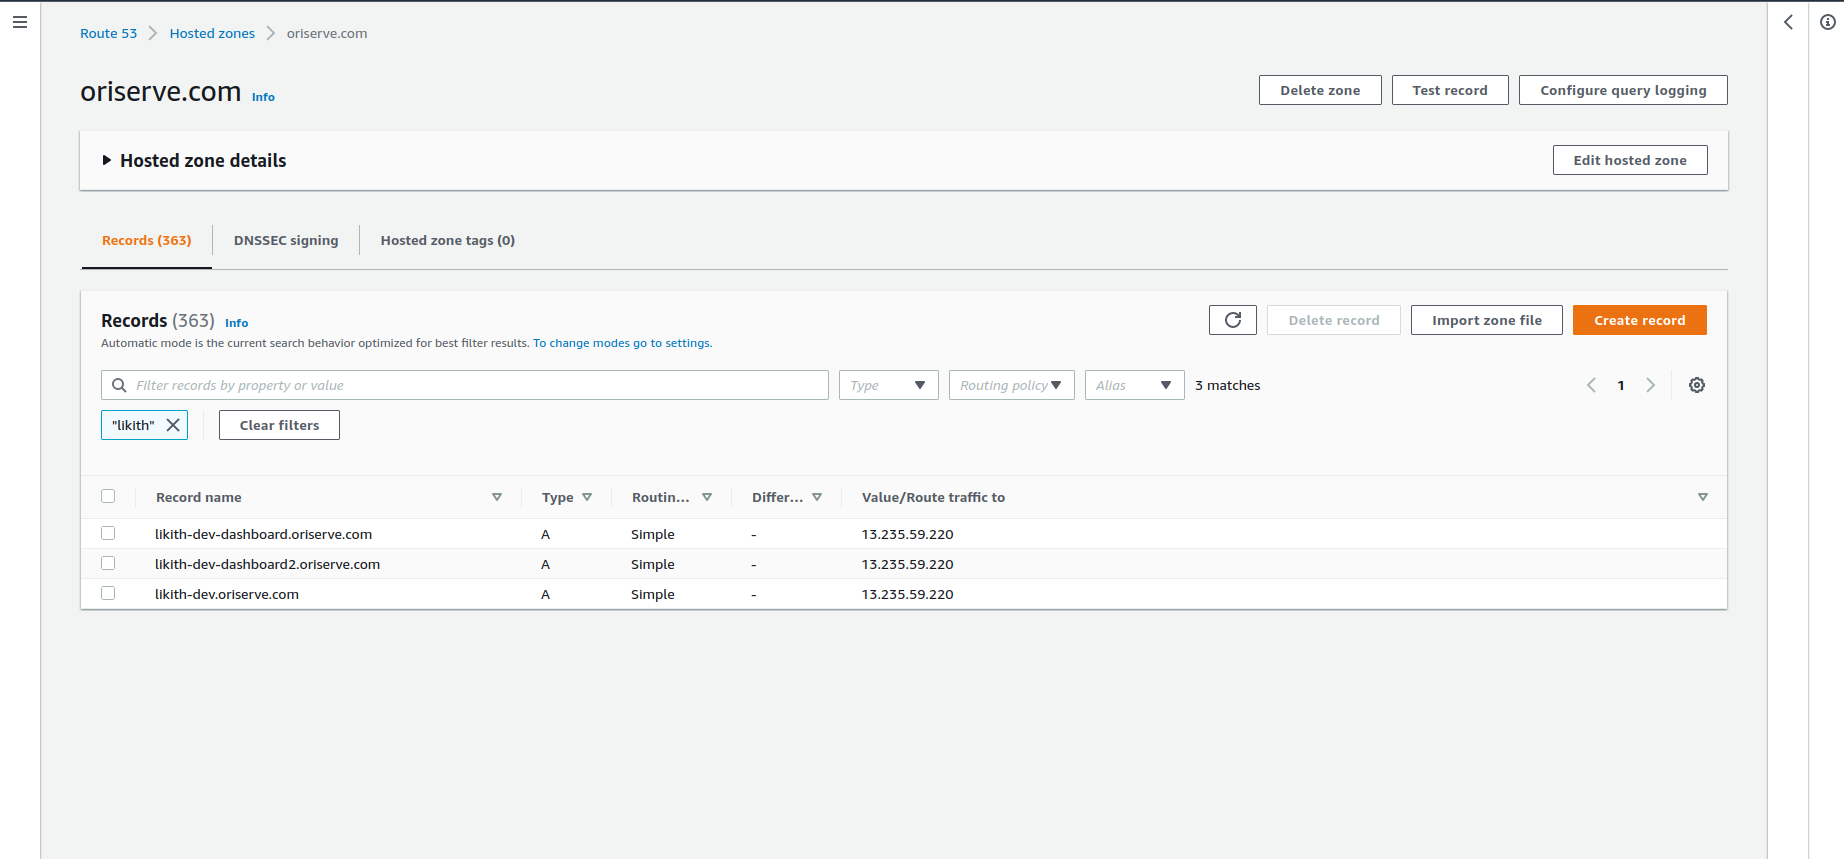
- Create an IAM role with the
AWSCodeDeployRole. - Now, go to the
AWS CODEDEPLOYservice and create an application for your brand with the nomenclature of brand-environment.Below SS is for your reference.Choose theEC2/On-premisesas compute platform in below image.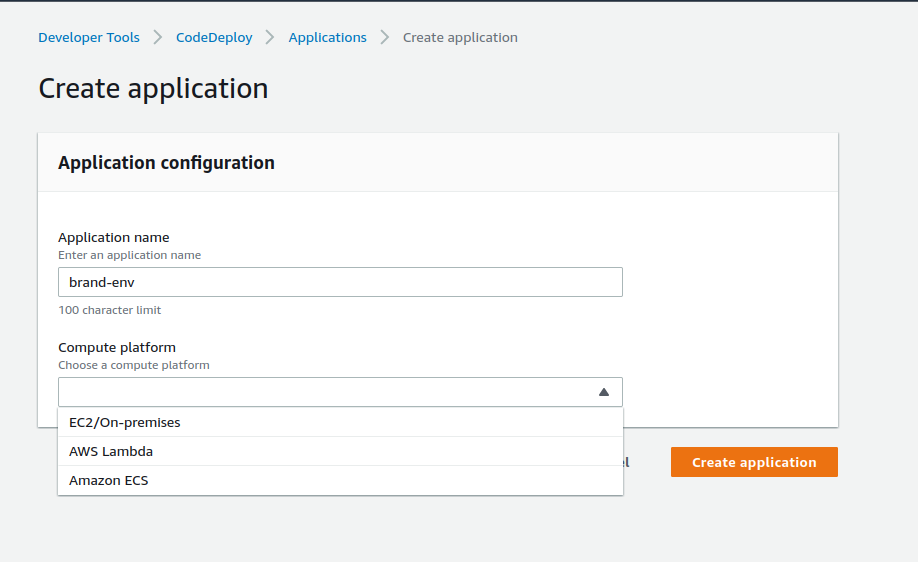
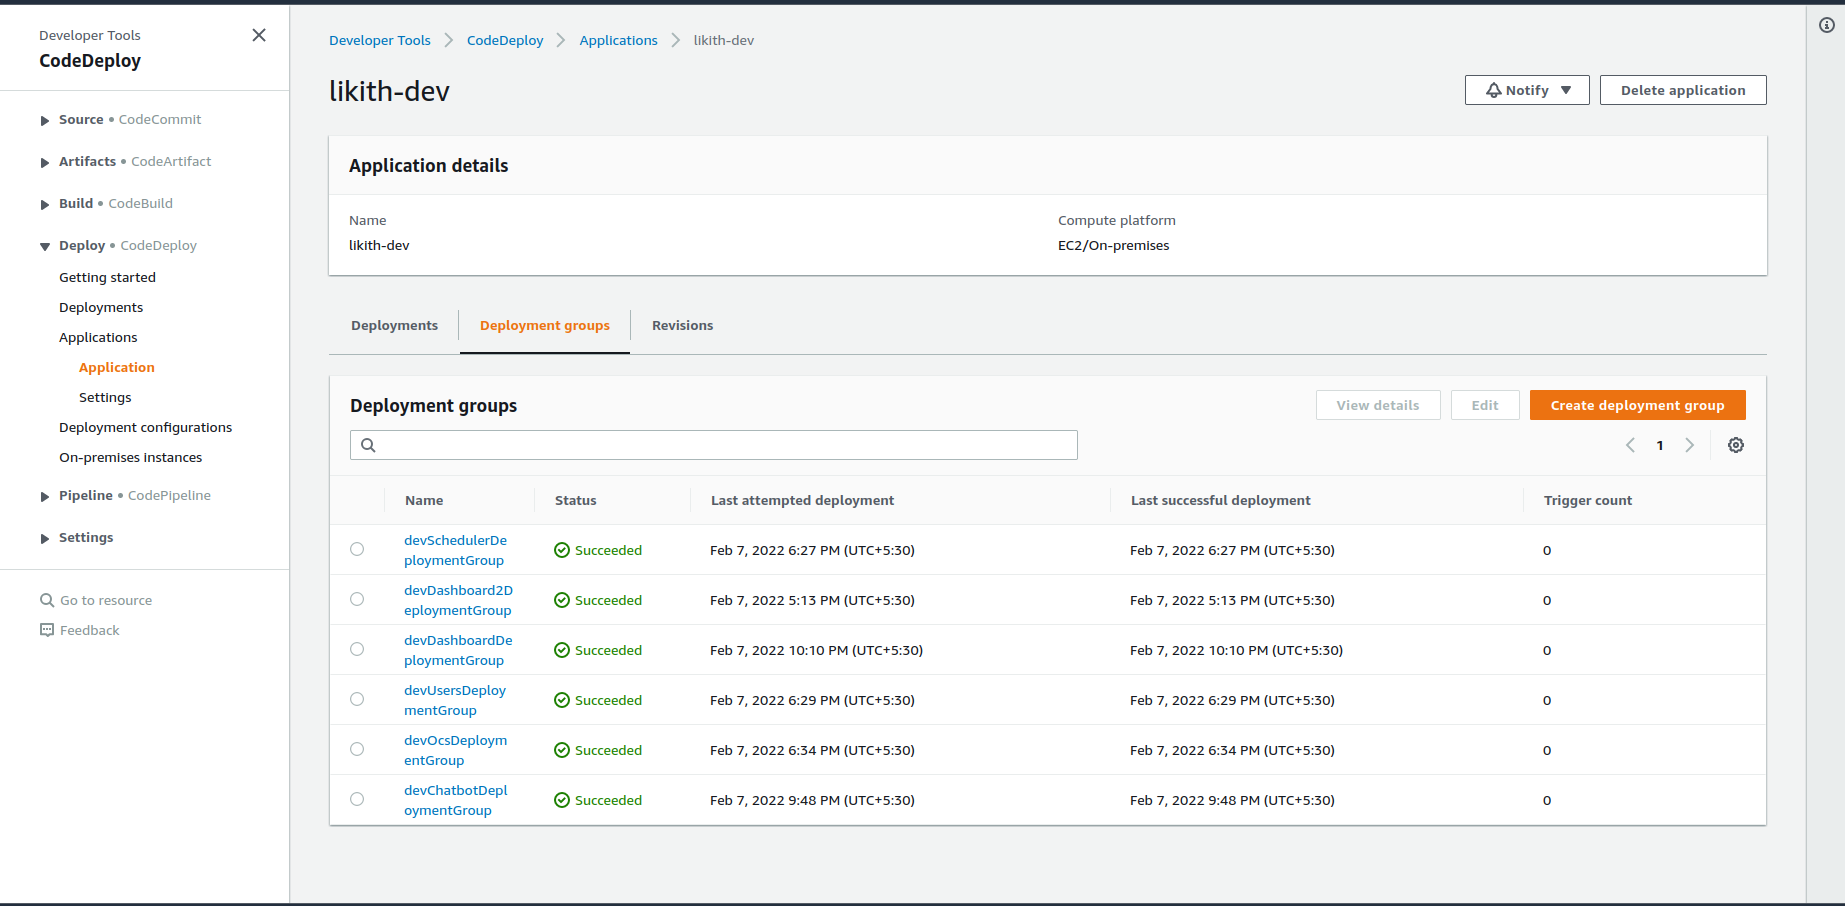
- After successfully creating the applicaion, create the DeploymentGroup for your each service with the nomenclature of
environment-service-DeploymentGroup. Please take the below image as reference.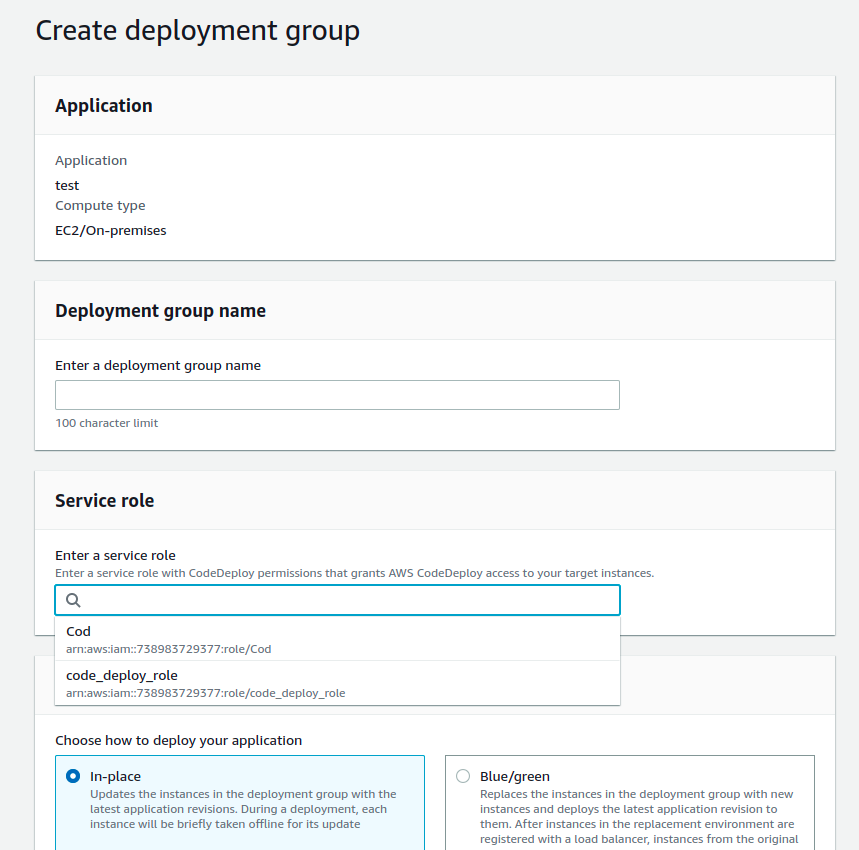
- Give the deployment group as above nomenclature.Under service role, select the created IAM role.
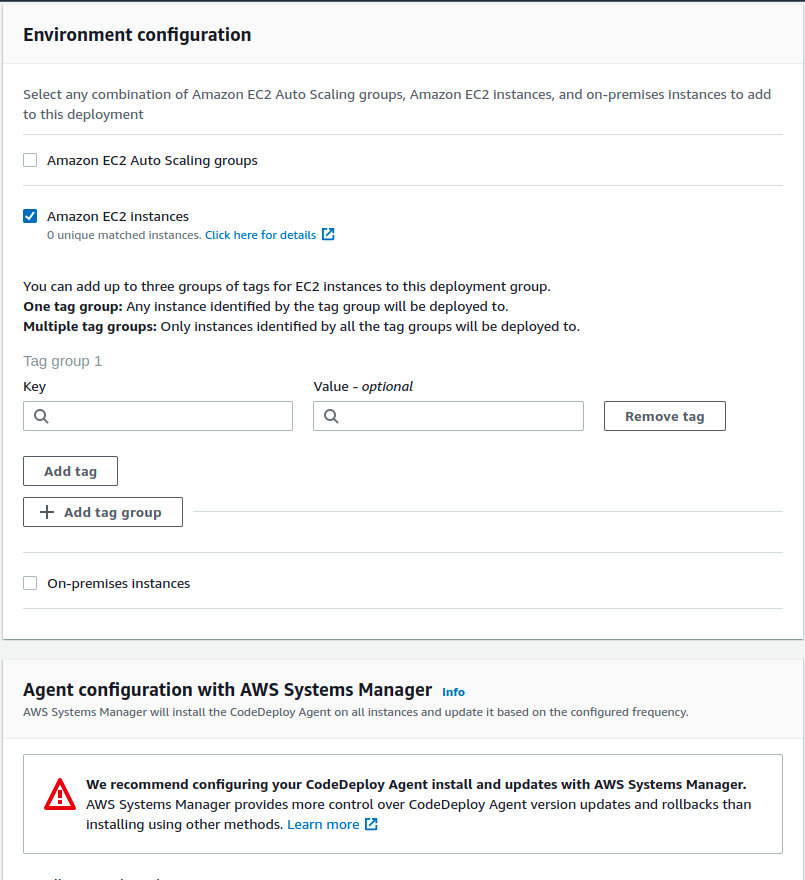
- Under Environment configuration, select the EC2 instances, and select the instance thats on to deploy.
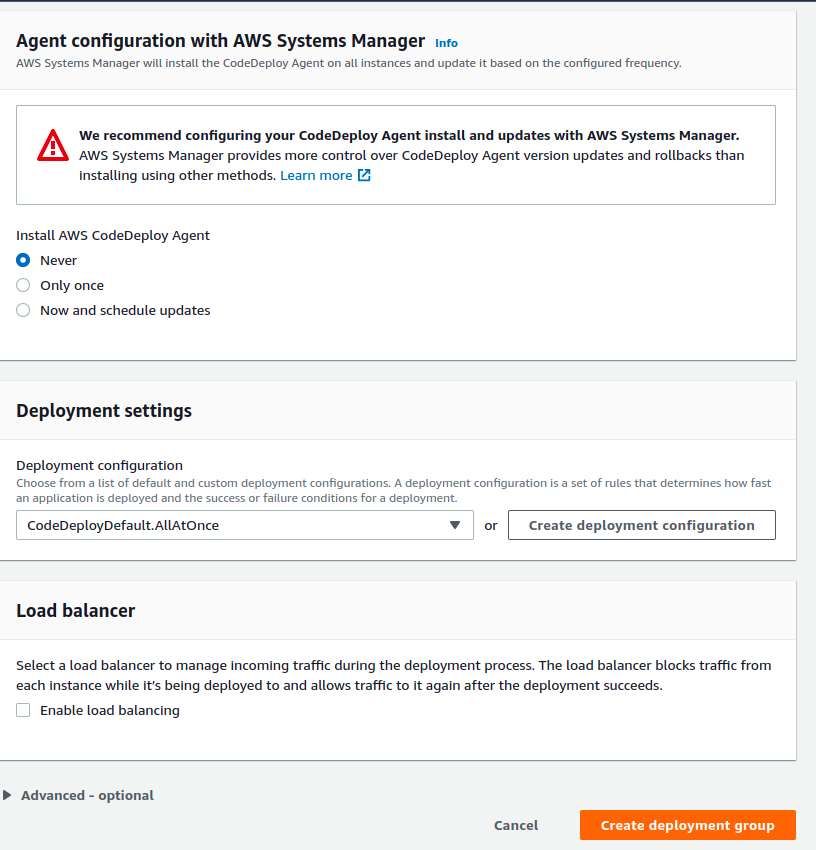 )
) - Make sure that the
AWS Code Deploy Agentis selectedNeveruncheck theLoad balanceroption. Create the DeploymentGroup. - Follow the same procedure for every service.
SERVER CONFIGURATION
Log into the server using terminal for further process.
nginx config file location:
/etc/nginxPath at which code is stored:
/var/node/appsPath at which the services config files:
/etc/nginx/config.dGet the
nginx.confanderror.conffiles from the/manjeet-test-ori/likith/WebTier/Environment/Development/nginx/to nginx config location on the server.Get the config files of OCS,Dashboard,Dashboard2 from the
/manjeet-test-ori/likith/WebTier/Environment/Development/config.dinto the service config path.Generate the ssl certificates using cert-bot by using below command:
  sudo certbot -d brand-environment-service.oriserve.com --nginx
Ex: sudo certbot -d likith-dev.oriserve.com --nginxVerify by browsing your domain.
We use MongoDb, redis, RabbitMQ as our database through docker container.
Get the below commands by to run the databases:
        sudo docker run -d --name mongoDB -v /home/ec2-user/new-mongo-data:/data/db -p 27017:27017 mongo:3.6 --auth
        sudo docker run --name redis -p 6379:6379 -d redis redis-server --requirepass redispass
        sudo docker run -d --hostname rabbitDemo --name rabbitDemo -e RABBITMQ_DEFAULT_USER=demorabbitori -e RABBITMQ_DEFAULT_PASS=kmVng7CGzCKZXuivFwhIKirViHTNQ1_c -p 5672:5672 -p 15672:15672 rabbitmq:3-management
- Lets see how to connect to the database (mongoDB) that you installed on the server using docker.
- Now, you can connect your db as follows.
- We use
Nosqlboosterwhich is an GUI tool to connect with the DB. you can download from the Nosqlbooster - Format of the URI to connect to DB is
mongodb://dbusername:dbpass@IP:27017/dbname?authSource=dbname. Change the details according to the project. - After modifying the URI, go to Nosqlbooster,
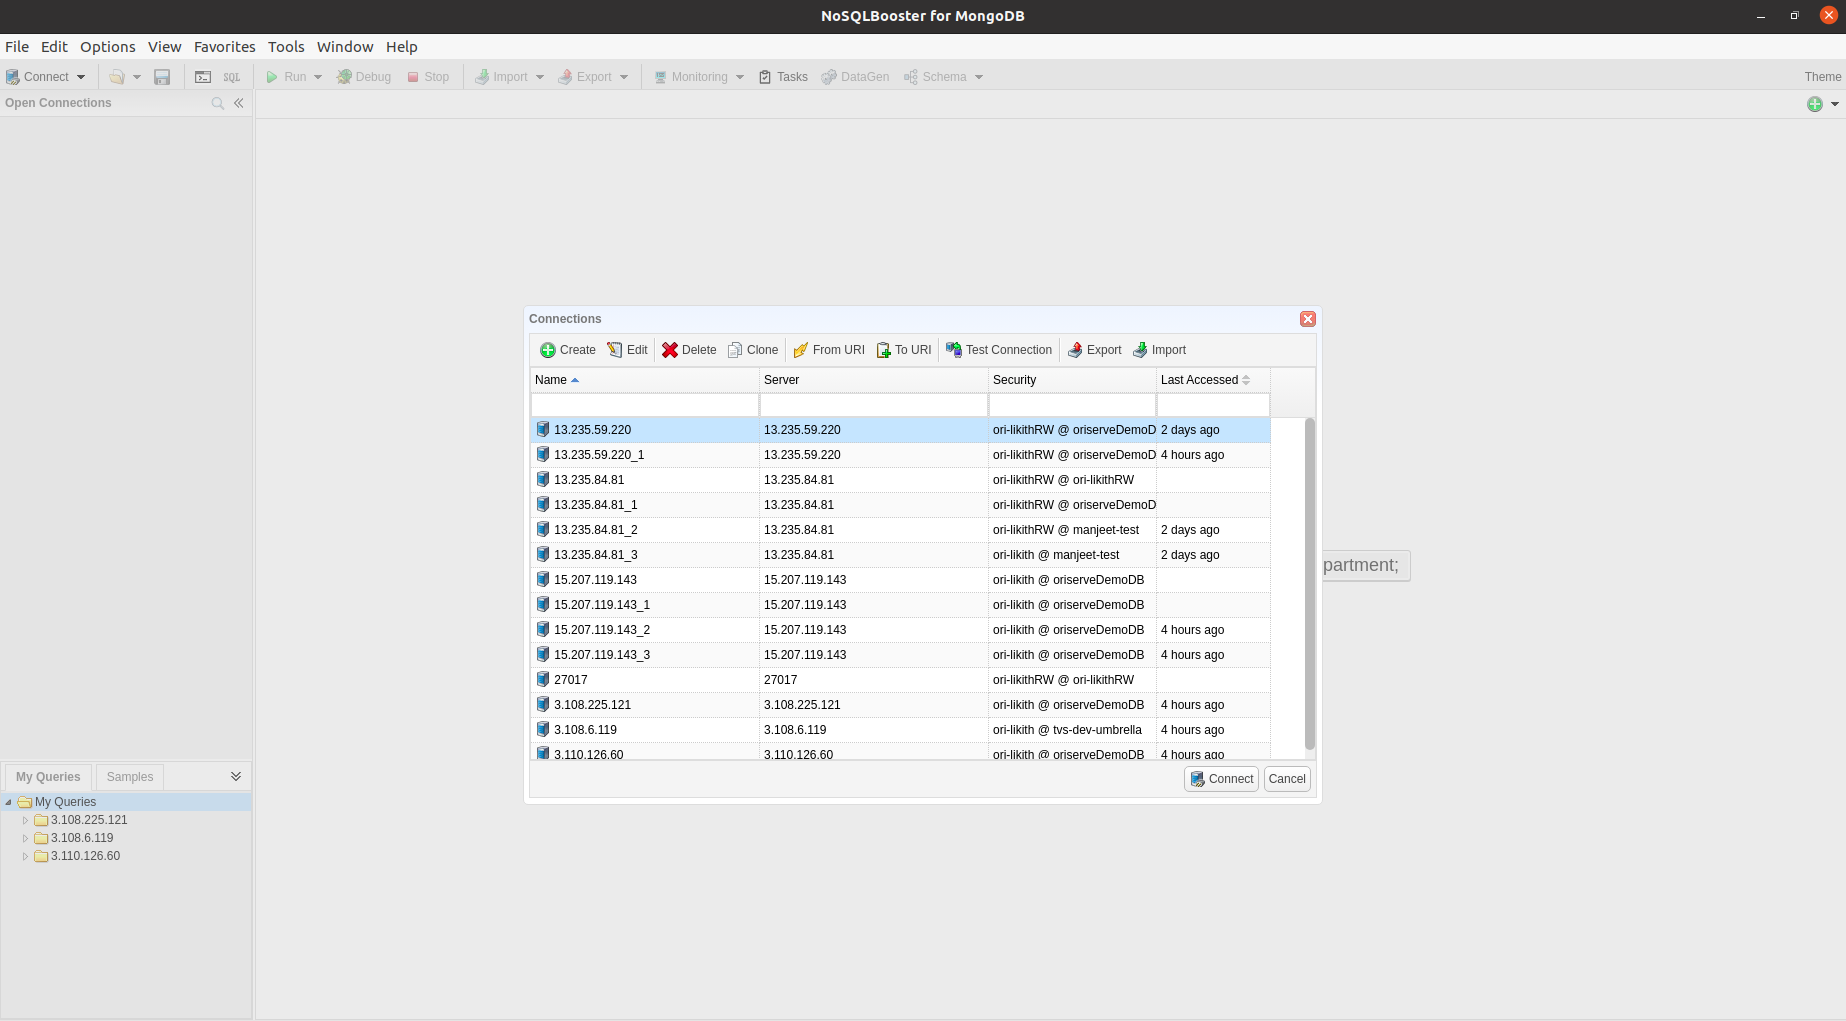
- Top right you can see an option
connectclick on it, it will prompt you an dashboard to selecto the method to connect. - Select the
FromURIoption and paste your URI (if you copied the URI, mostly automatically it will paste. If not paste manually) and click connect to connect to your database.
CODE LEVEL CHANGES
Before configuring the jenkins and building it , Now we will see the changes that are needed to be done at code level for dashboard,dashboard2 and chatbot.
Clone the repository into your local.Let's say
chatbot-dashboardrepository.Create the new branch with an appropriate nomenclature by using the command :
`git checkout -b <branch namae>`Modify the data of
export const BASE_URL_USERS,export const BASE_URL,export const BASE_SOCKET_URLin locationsrc/data/config/urls.jsto your brand OCS url. Here, the brand ocs url islikith-dev.oriserve.com(this is the address to which our request will redirect to))
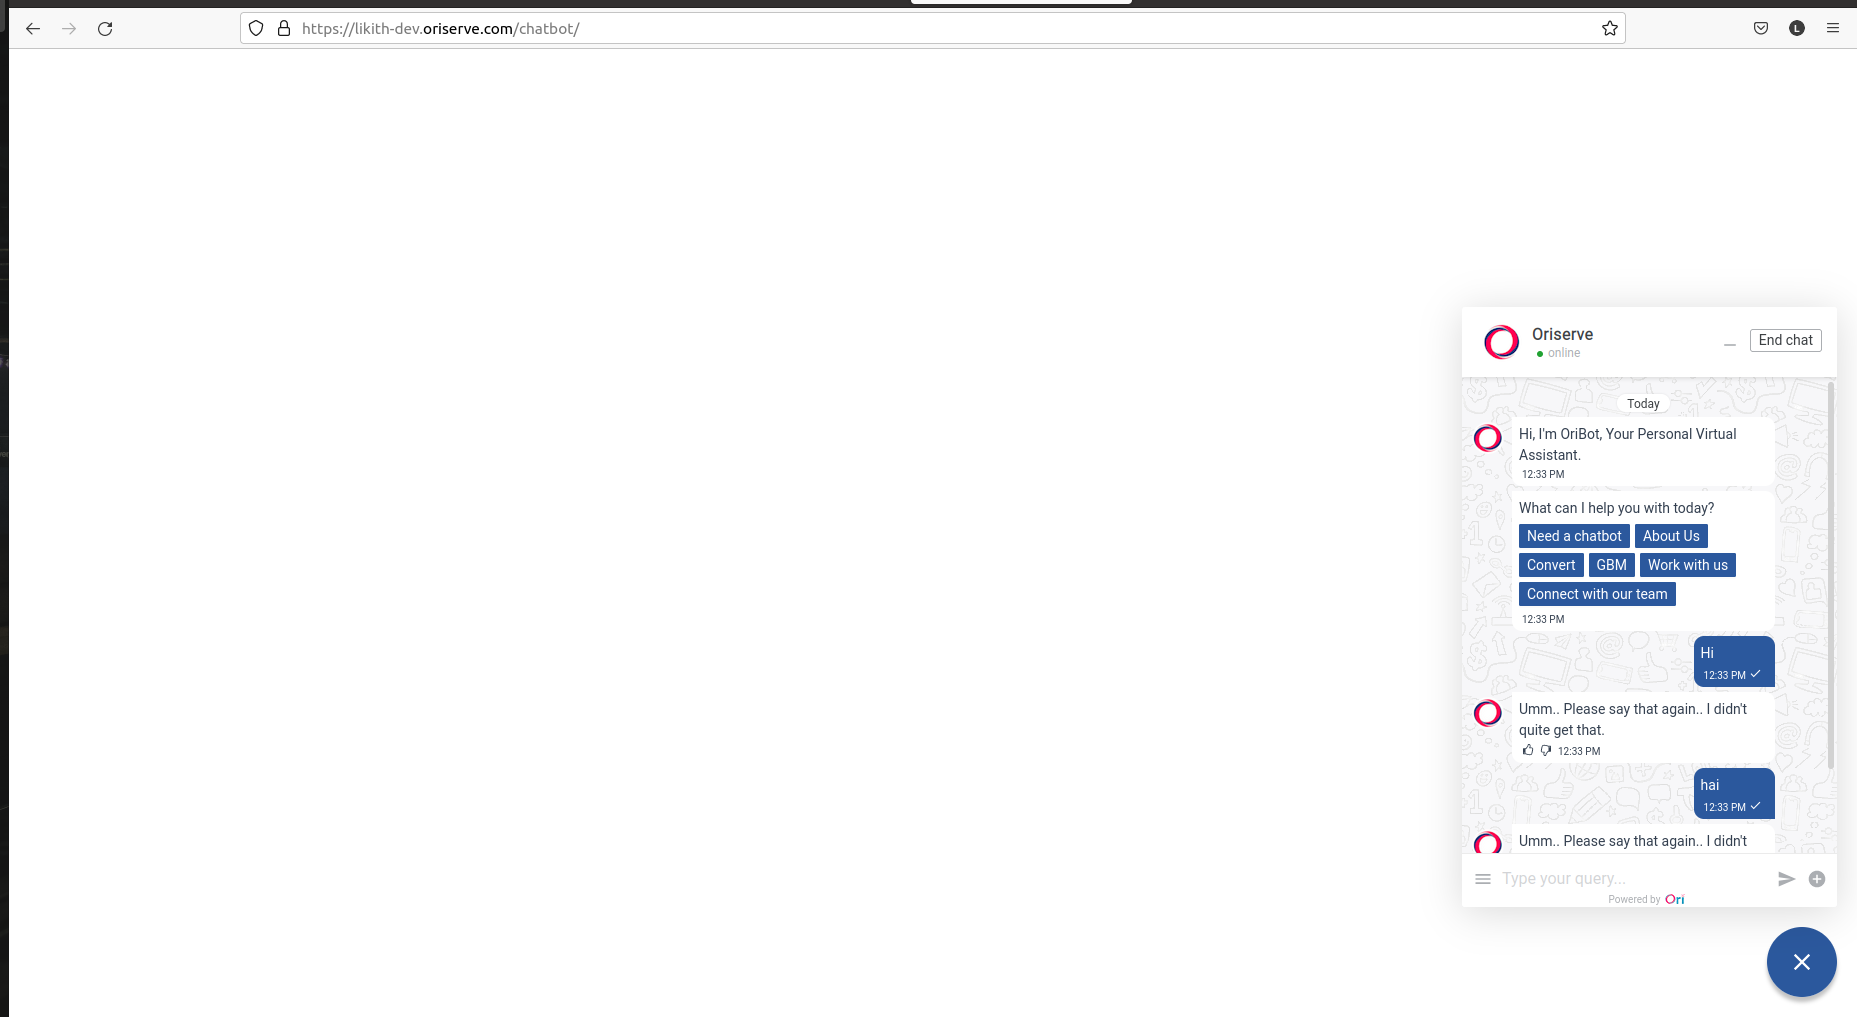
The result for this will show at the end of the document.
Push the newly updated code to the respective repository under newly created branch.
FOR
chatbot-2.0Modify the dataexport const socketUrlto your OCS url. SS for your reference.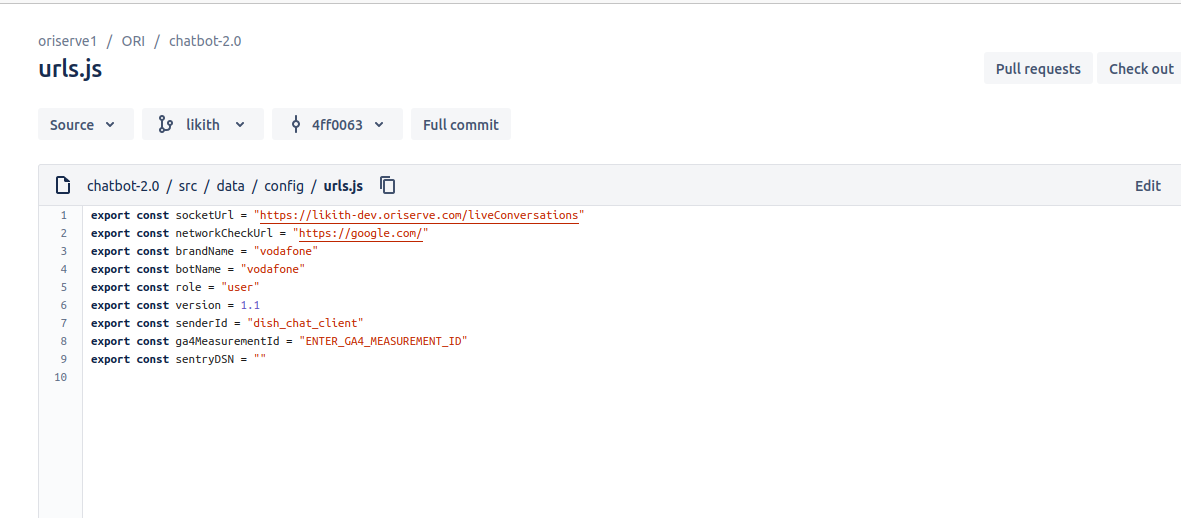
JENKINS CONFIGURATION
- Copy the Jenkins Job from the existing brands for reference as
environment-brand-serviceEx: dev-likith-ocs. - Lets say we are configuring the
chatbot-dashboard. - Under source code management, change the newly created branch, from where it fetch the code.
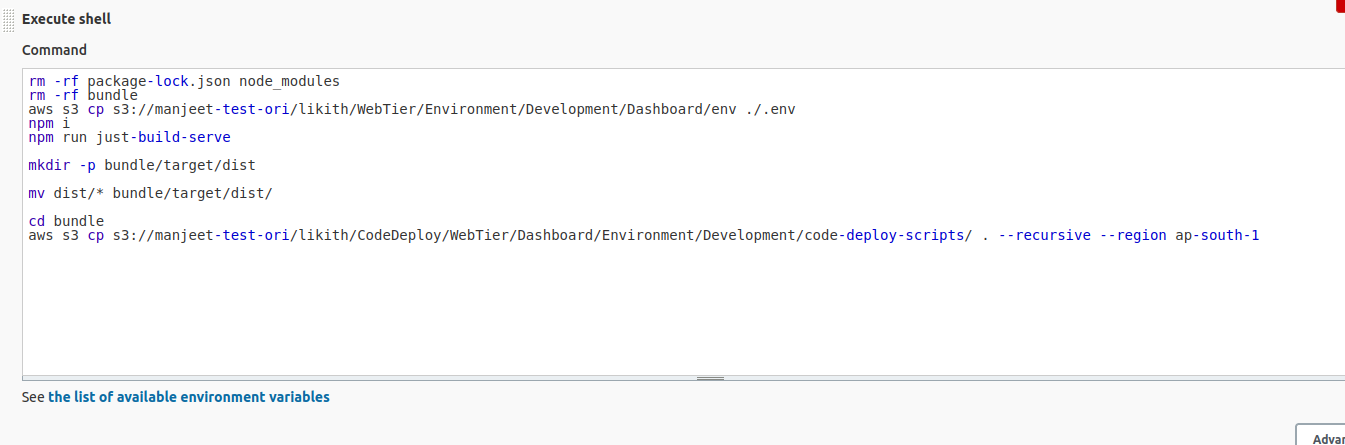
- In each job configuration, under build section, modify the Shell with your respective bucket and brand in place of
manjeet-test-oriandlikith.Below image for your reference. - For Dashboard service.
 .
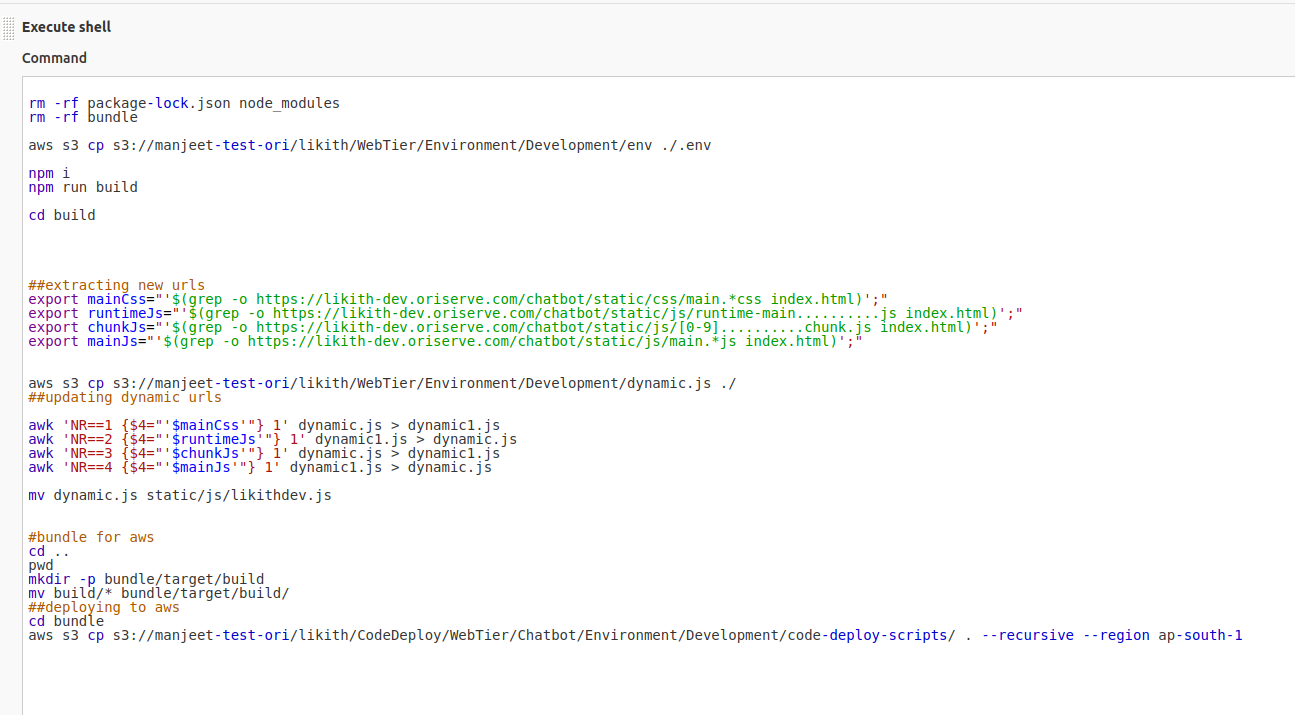
. - For chatbot service
- For Users service,

- Under POST-BUILD section modify the following details as per your Brand configuration.
- Env file location
- CodeDeploy Application
- CodeDeploy DeploymentGroup
- AWS region
- S3 bucket
- S3 prefix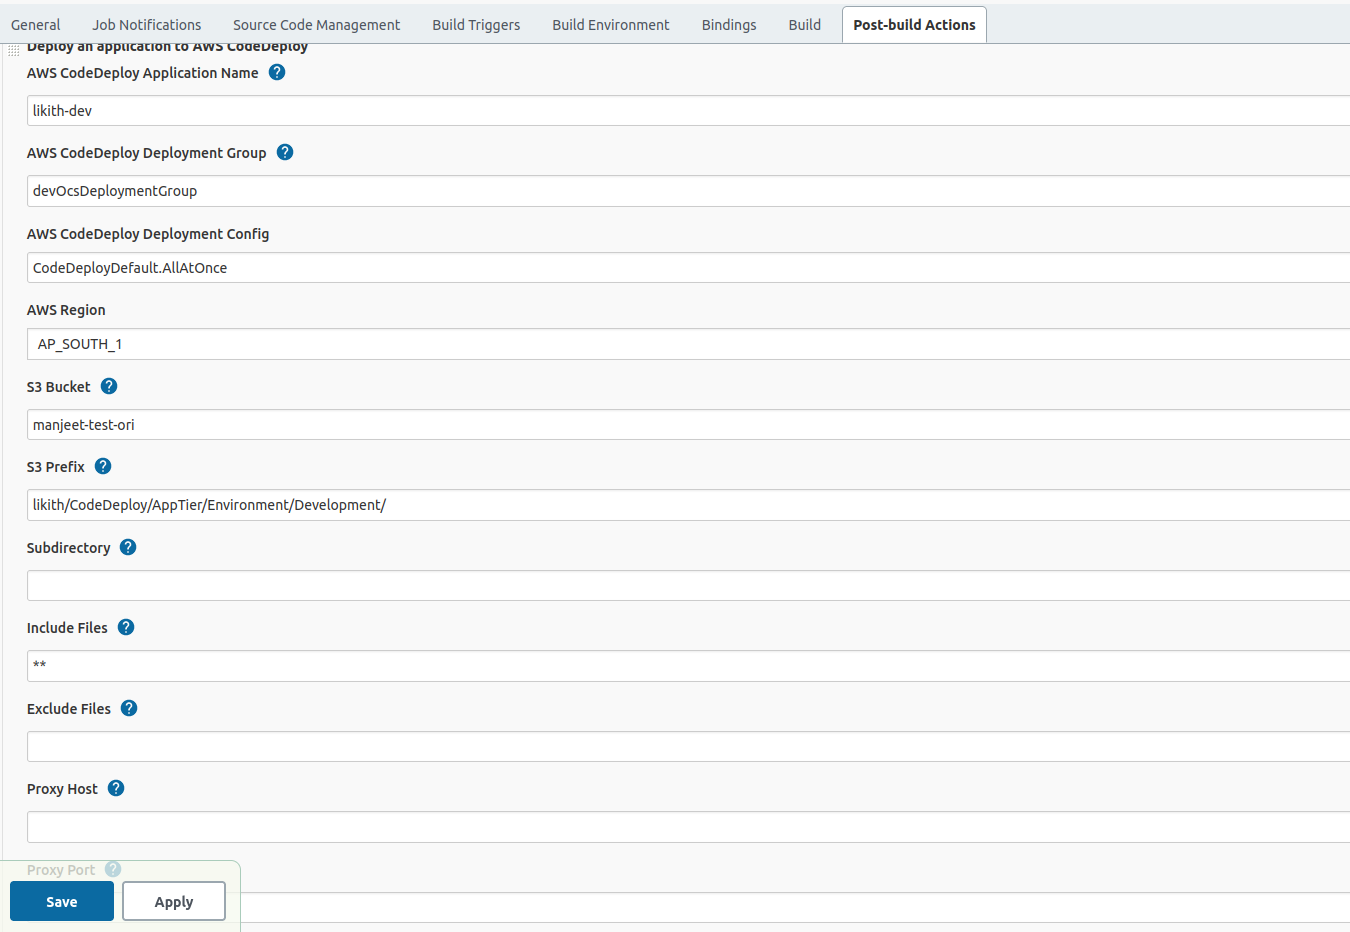
- Chatbot shell configuration, modify the
S3 URIpath as per your brand.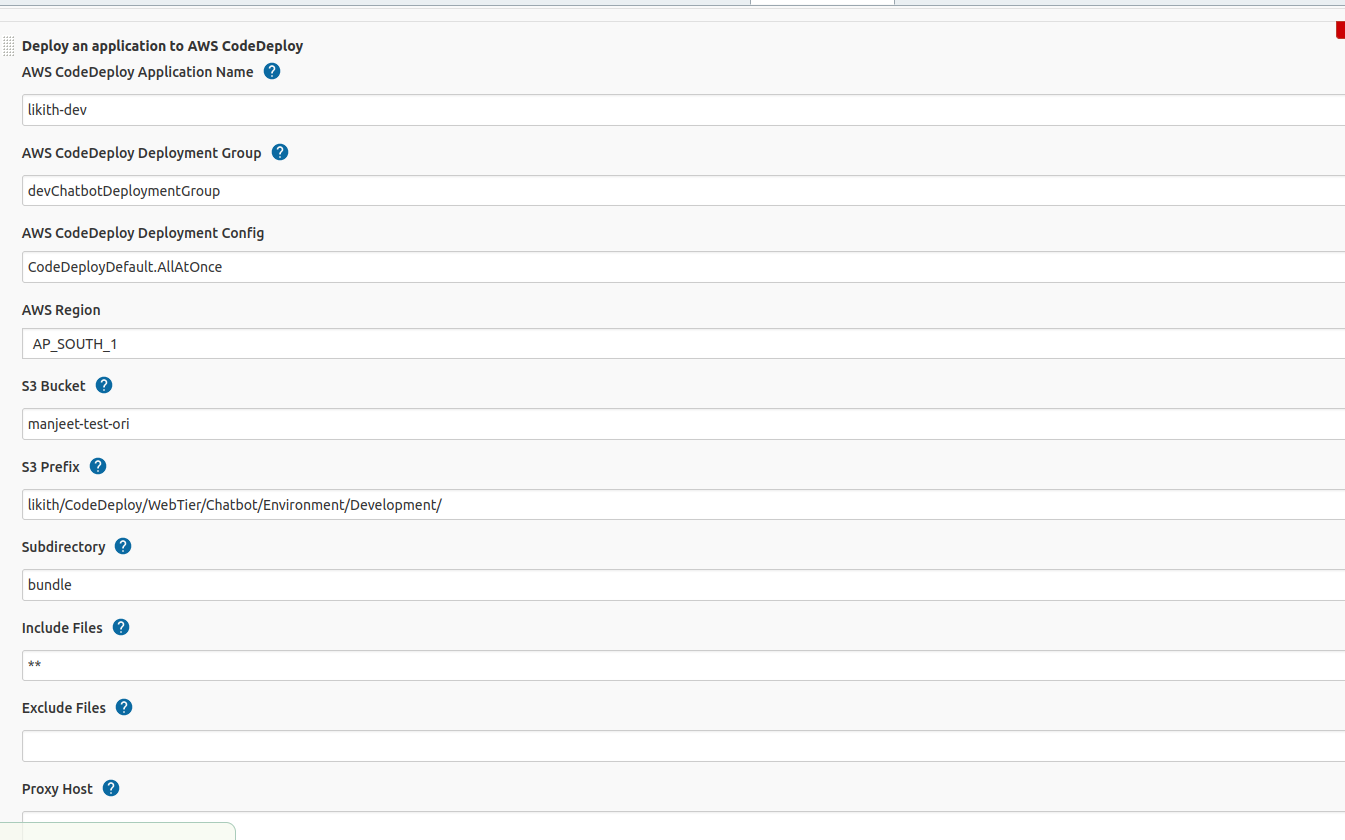
- Users shell configuration, modify the
S3 URIpath as per your brand.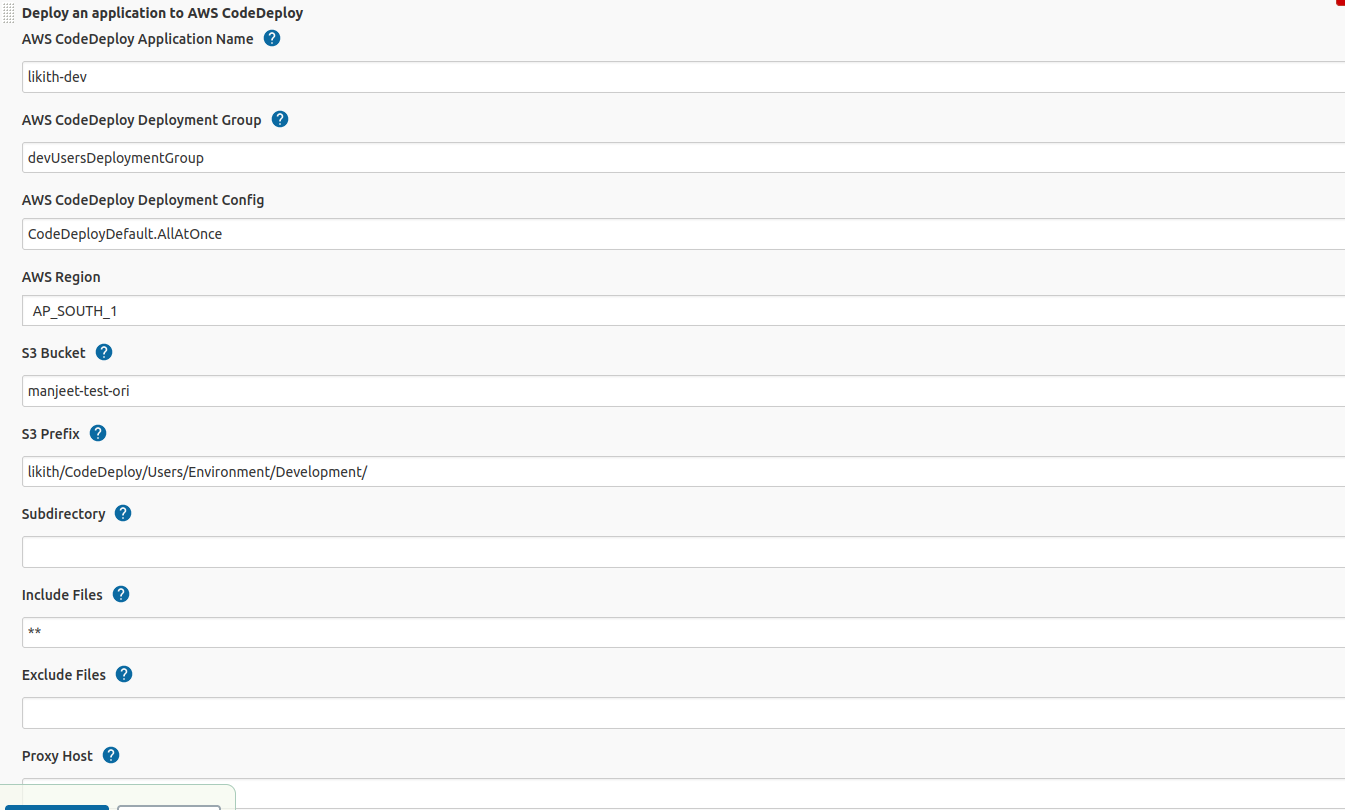
- Build the each job and first time it will get fails.
- Now, start the PM2 process on server as follows.
- PM2 - PM2 is an process manager for Node.js applications that has a in built load-balancer. PM2 enables you to keep applications alive forever,reloads them without downtime.
- Go to the path
/var/node/apps/ocsand run the below command.pm2 start --name ocs-8080 npm -- start
- Go to the path
/var/node/apps/usersand run the below command.pm2 start --name users-8087 npm -- start
- Go to the path
/var/node/apps/schedulerand run the below command.- `pm2 start --name scheduler-5000 npm -- start`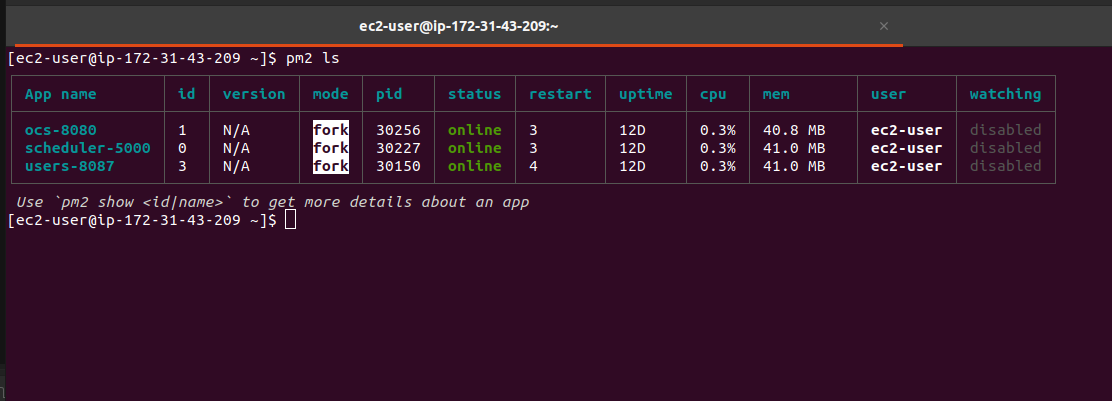
- Build the Job again and wait untill it gets success.
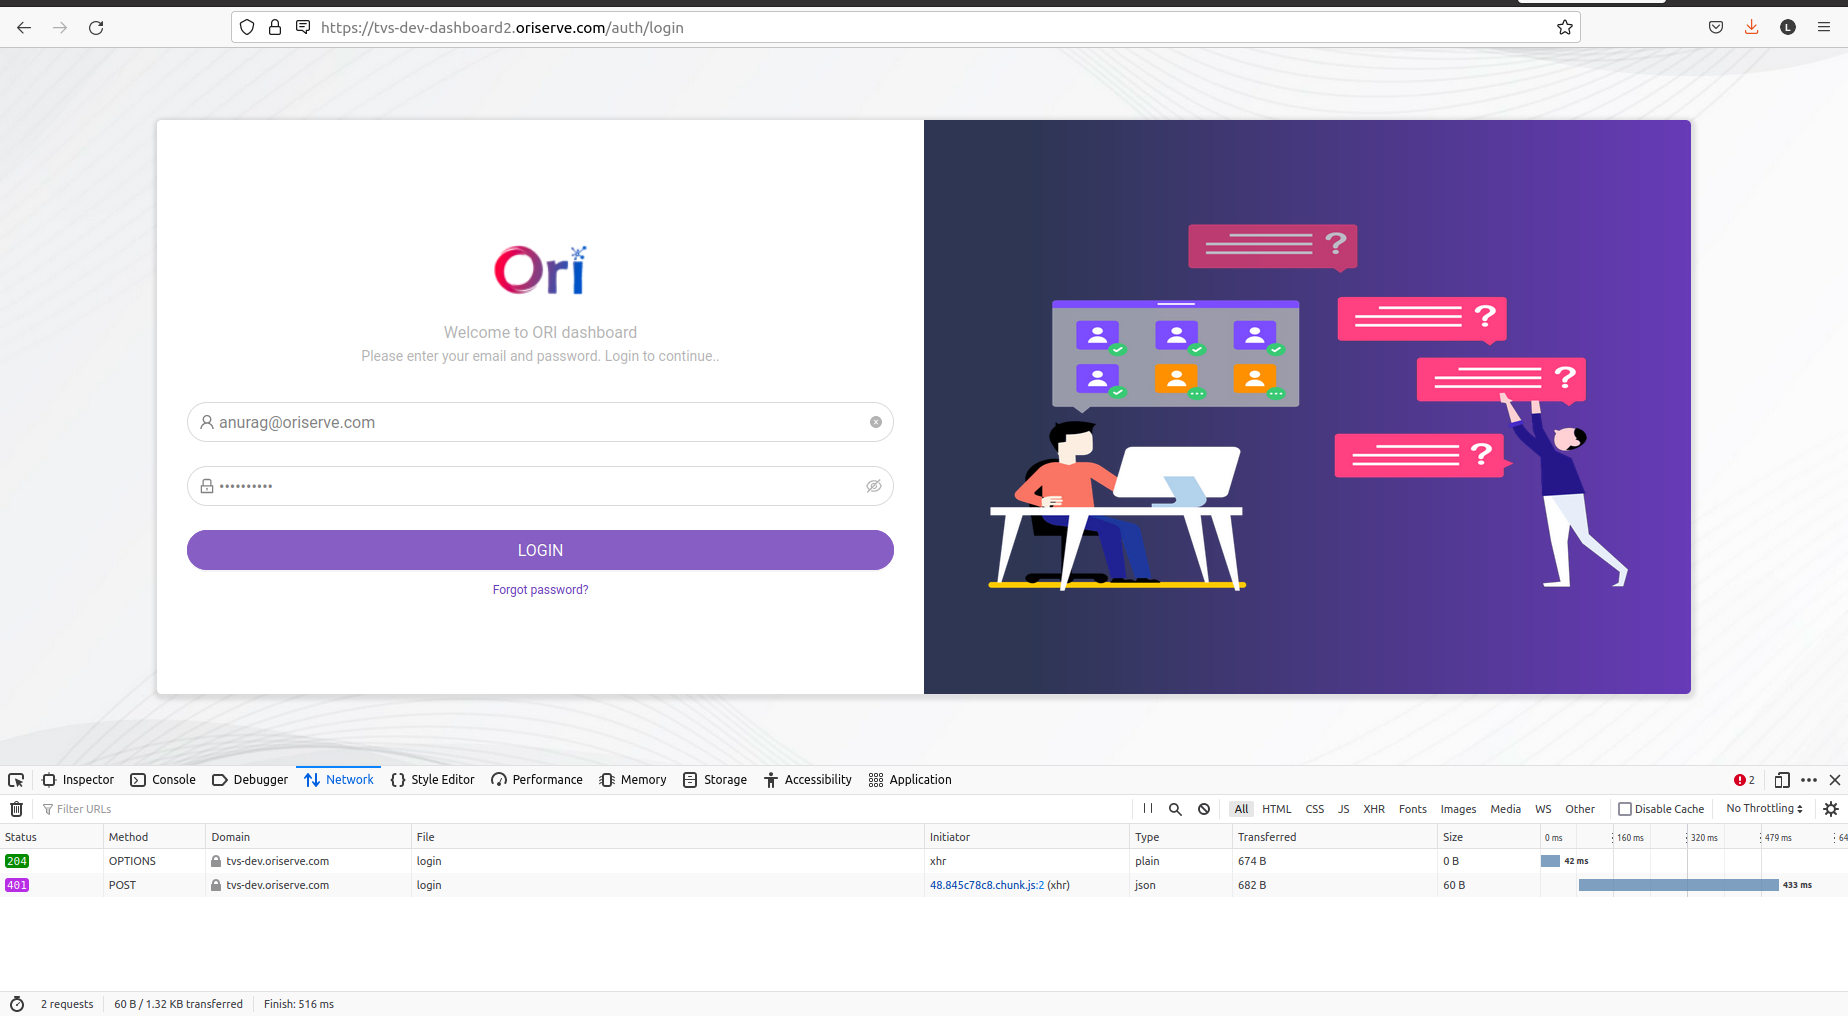
- Browse the OCS url, Dashboard, Dashboard2 url.
- Make sure that the backend listener should be the same brand service.