Automated Dev Stack Creation.
The docs cover automated dev stack creation using cloudformation. We have setup jenkins pipeline to deploy a new stack. In this stack generally 2 server will be created.
FullStack Server.
AI Server
- In FullStack server 5 services will be deployed i.e [ocs, scheduler, users, chatbot, dashboard].
- In AI server nlp service will be deployed. i.e [gunicorn]
Automated Steps using jenkins pipeline
Log into the jenkins.
Check for view
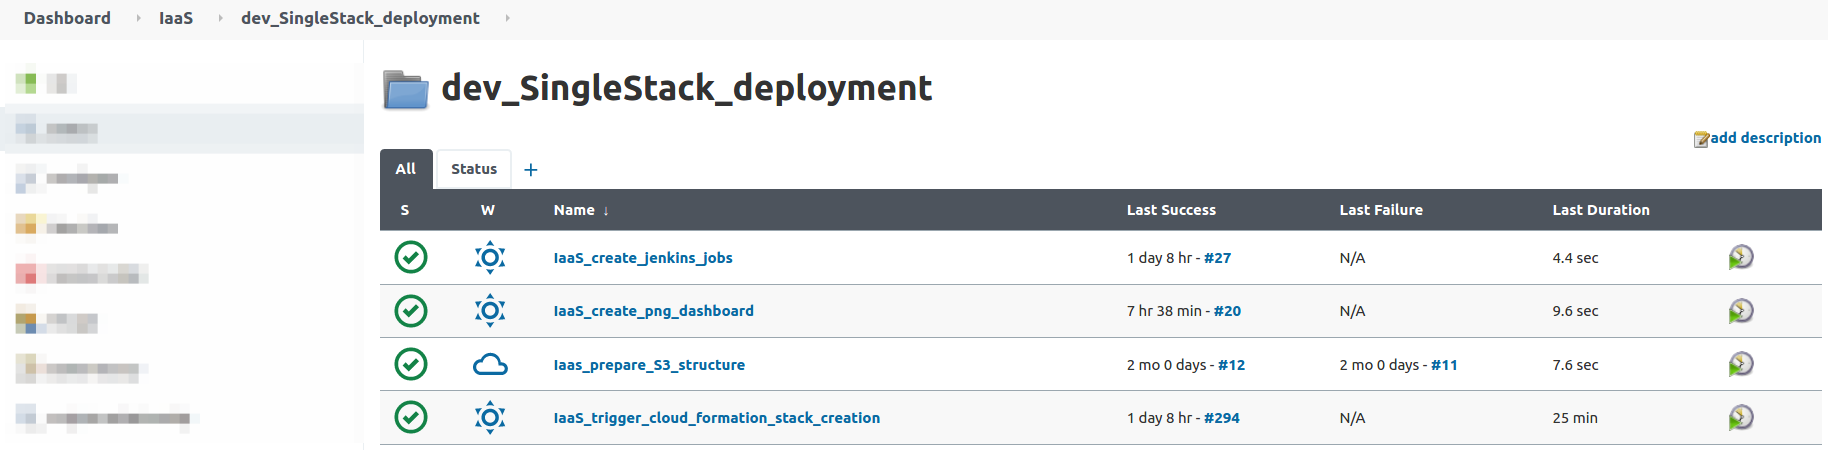
IaaSthen go theIaaS->dev_SingleStack_deployment-> jobs.Here are the all jobs which we used to create a stack. Below screenshot for your reference.
There will be a master job
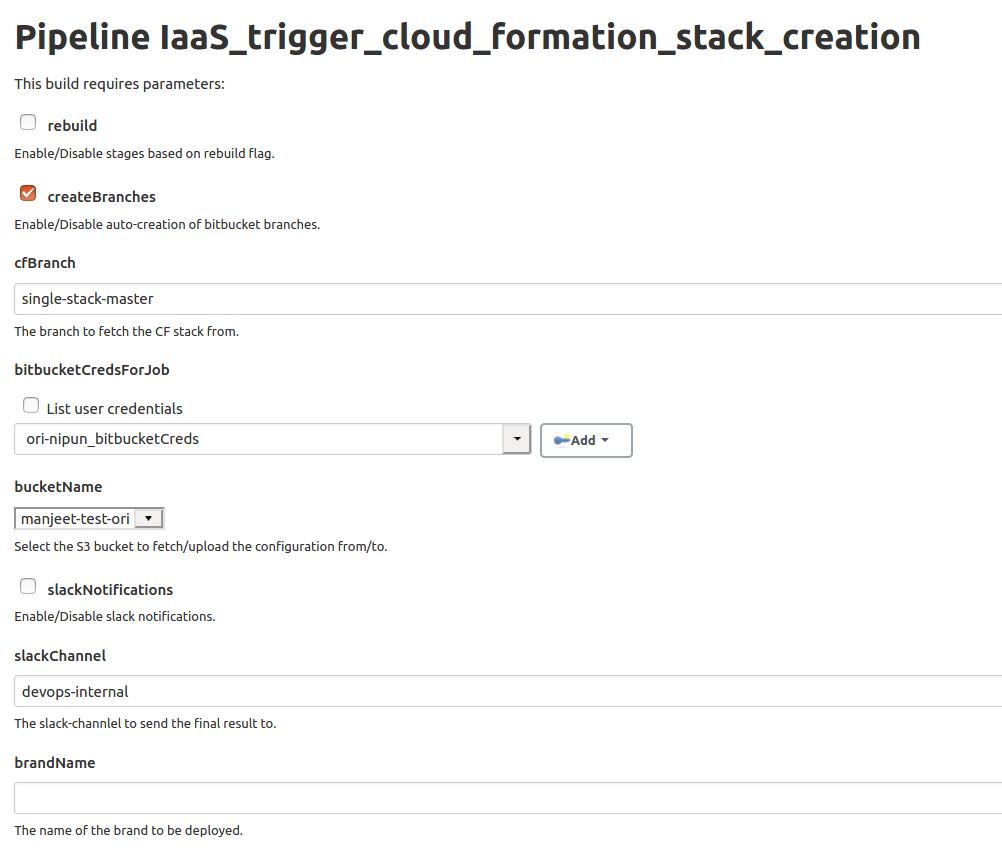
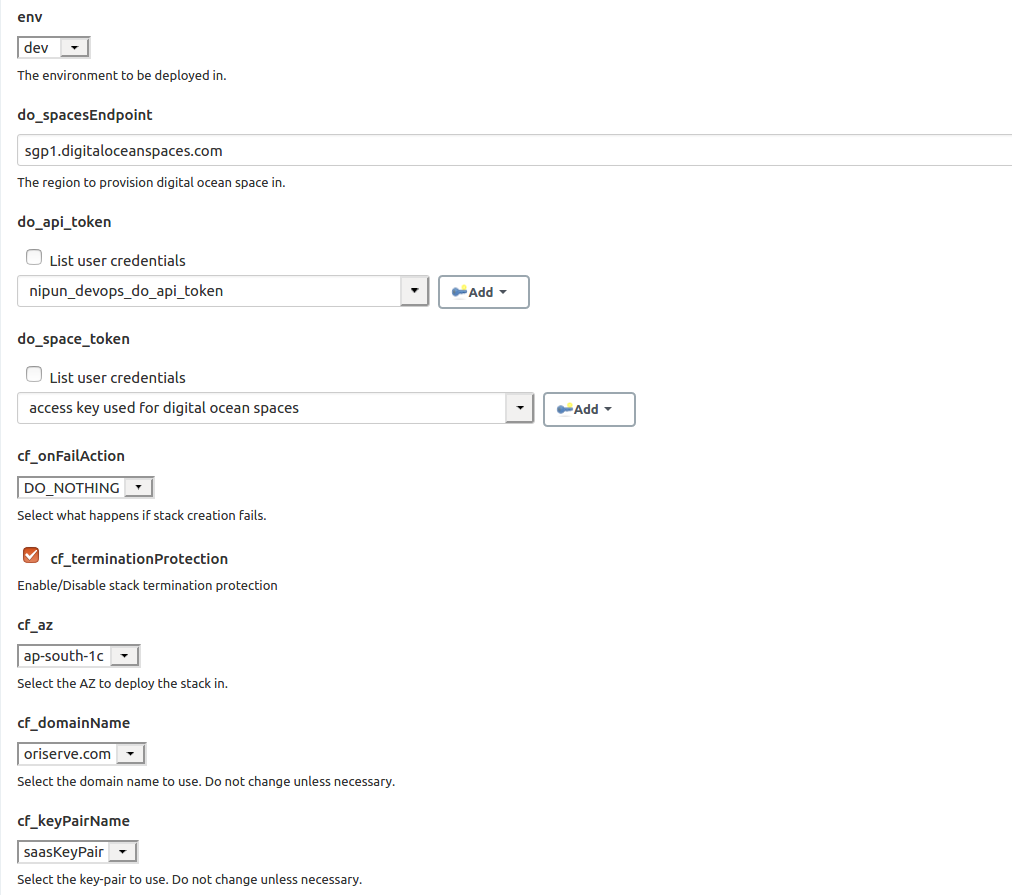
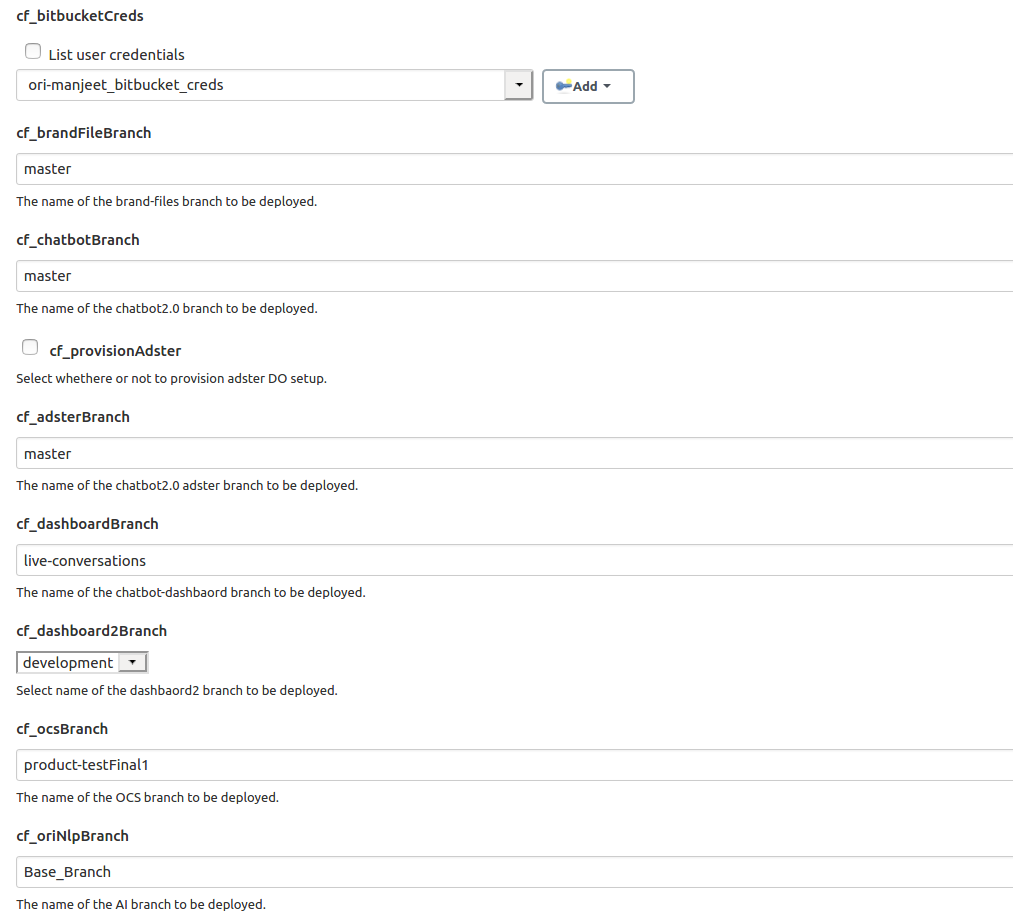
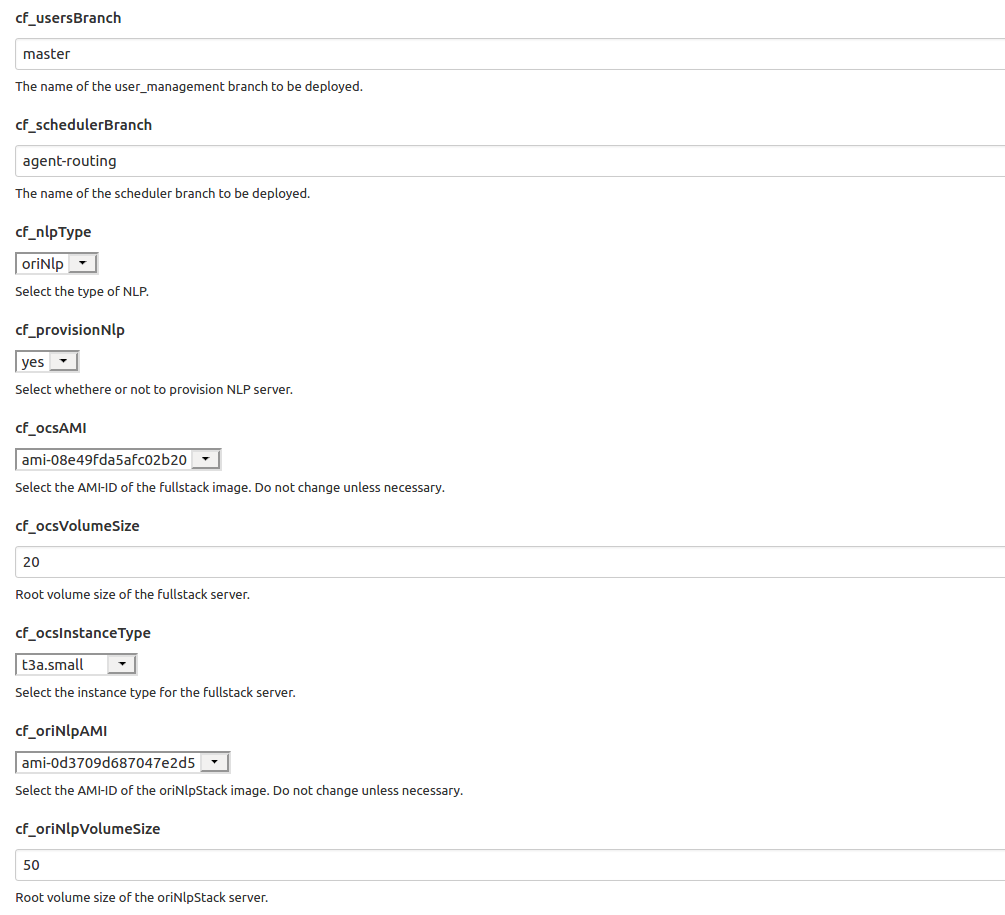
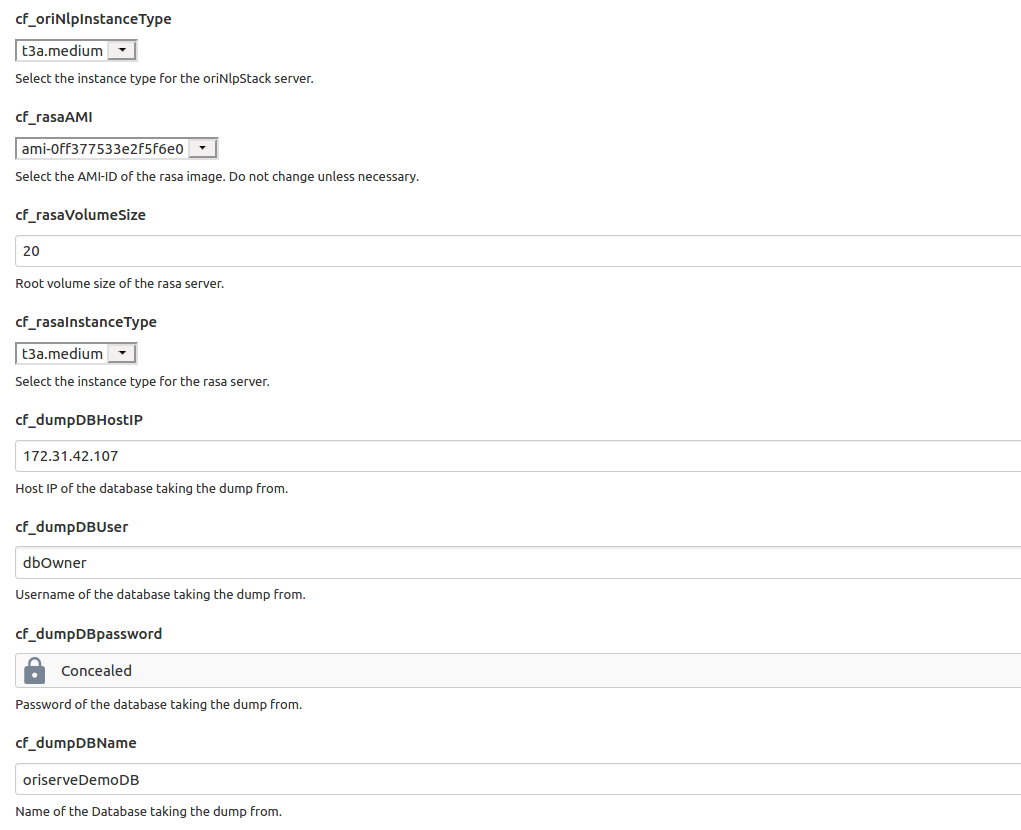
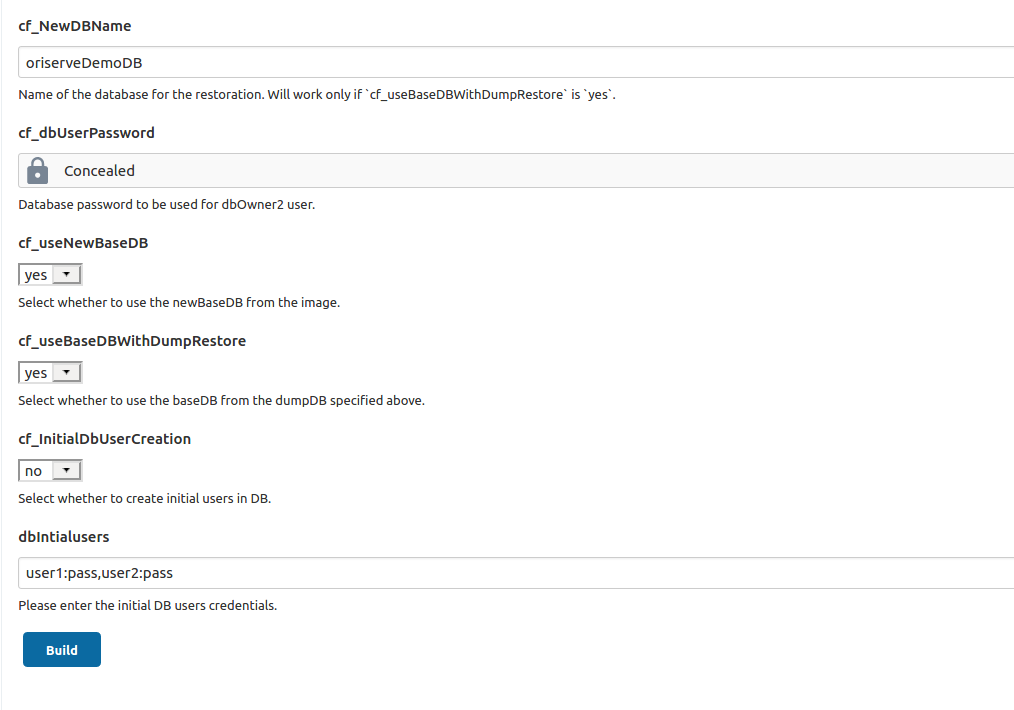
IaaS_trigger_cloud_formation_stack_creationonly this you have to use to create a stack. other jobs are triggered with this job like jenkins deployment job creation & png dash creation etc.Open the job and enter the required parameters and build the job. Below screenshot for the better understanding of job.
please don't change default values of any parameters until it's not necessary
After the job succeeds, all stack details will go on defined slack channel in the job.
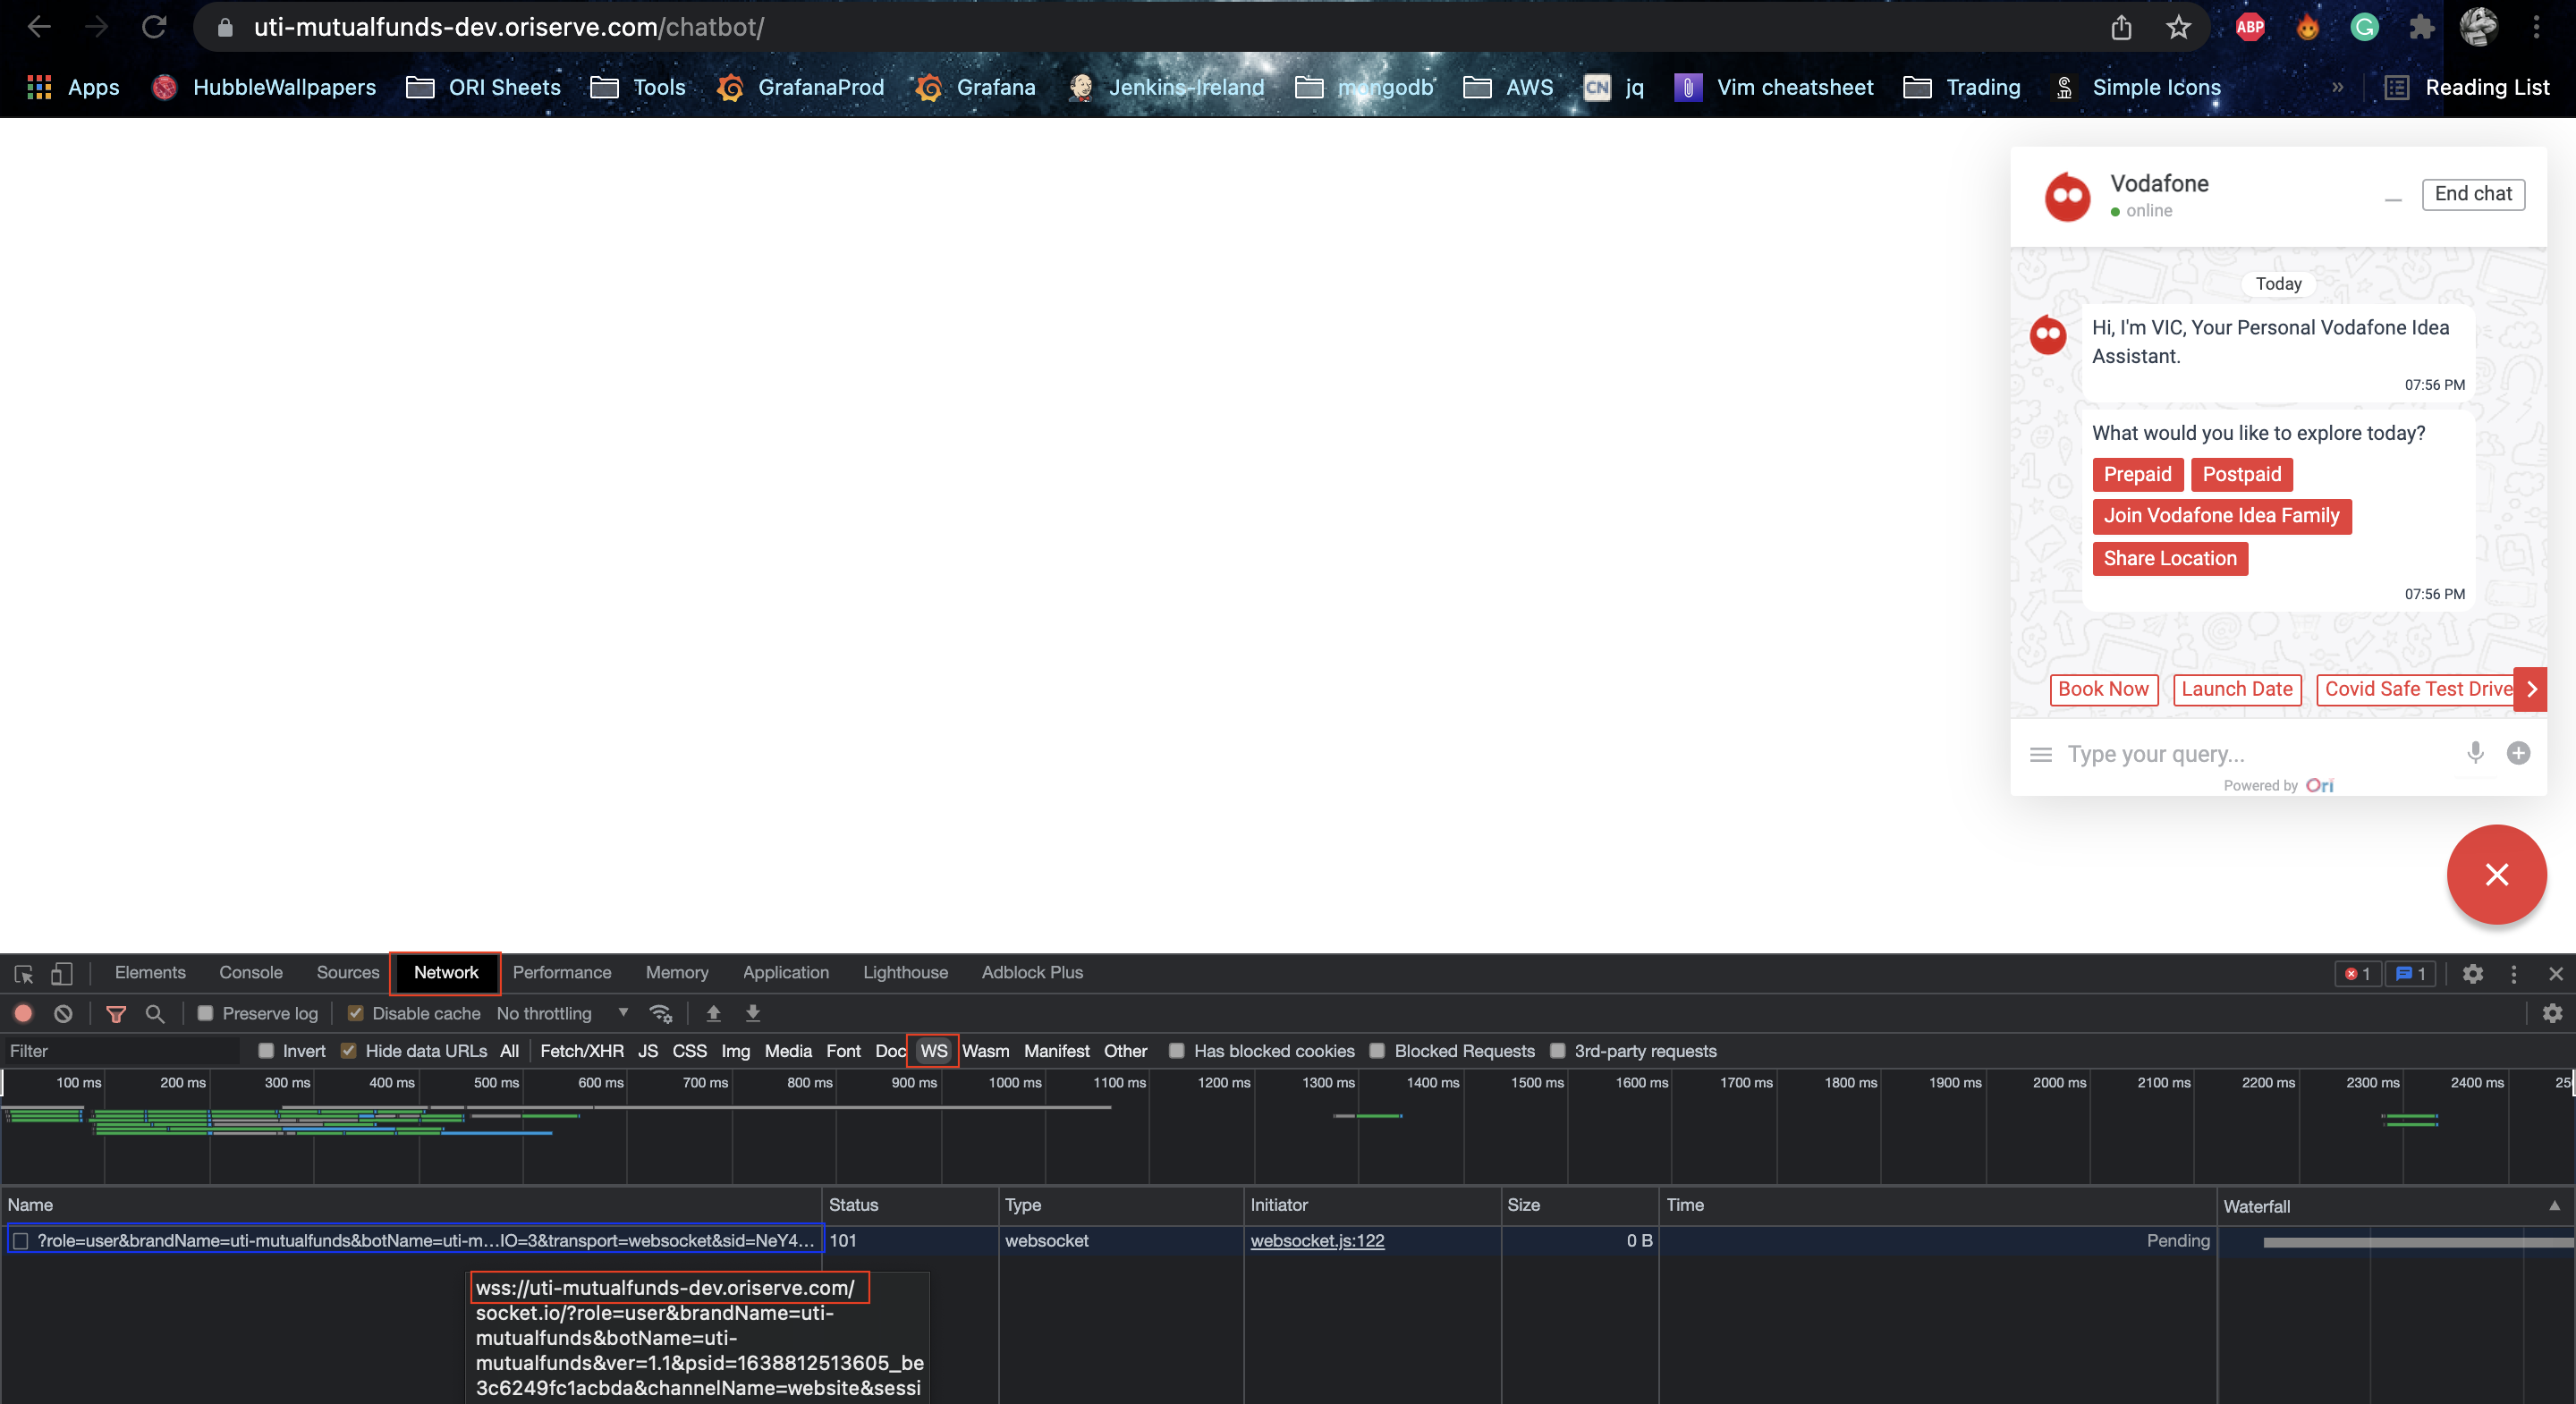
Also please verify with the chatbot and dashboard urls that all are working fine or not. Make extra sure that the backend URLs of both chatbot and dashboard are correctly configured.
- For this launch the Chatbot/Dashboard URL
- Using chrome dev tools inspect the page
- Go to the network tab and filter for only WS requests.
- You'll notice a few WS requests there, if you don't, click on the chatbot or reload the page once.
- Hover on that request on you'll get the full URL, make sure that URL should be the configured backend URL for that brand.
- Here's a screenshot for reference. This shows only for chatbot, same has to be done for dashboard as well.
Do chat with the chatbot with msg
The Devil& chatbot should be responsive. it means reply coming from nlp server and nlp server are working fine as well and then check with login in dashboard that are working fine.After that check in access management repo there will be a PR which created during stack creation from branch name like
tmp/dir_add_brandName.This PR will be approved and merged by devops lead.
For development stack:
- After merged with tha main branch then run git pull to update your branch in your local system then add intial users for server access in
usersfile insideuserKeysfolder and for db access add all users which is created in db except root indbUsers.jsonfile insidedbUsersfolder in that project and then add the db details indbnameanddburifile iside thedbRolesdir then push into the branch. Also you take ref from any existing brand. - After pushing into the branch run the required accessmanagement job for dbuser access and server access in jenkins.
- After merged with tha main branch then run git pull to update your branch in your local system then add intial users for server access in
For testing/production stack:
- Do the same steps as dev and also add the db root creds in jenkins credentials. below ss of eduction-first brand is for you ref.

After that create a brand parameter in aws parameter store and add the db details here. you can take reference from any other brands parameter as well.
Now all good Congratulations on your success.
Note
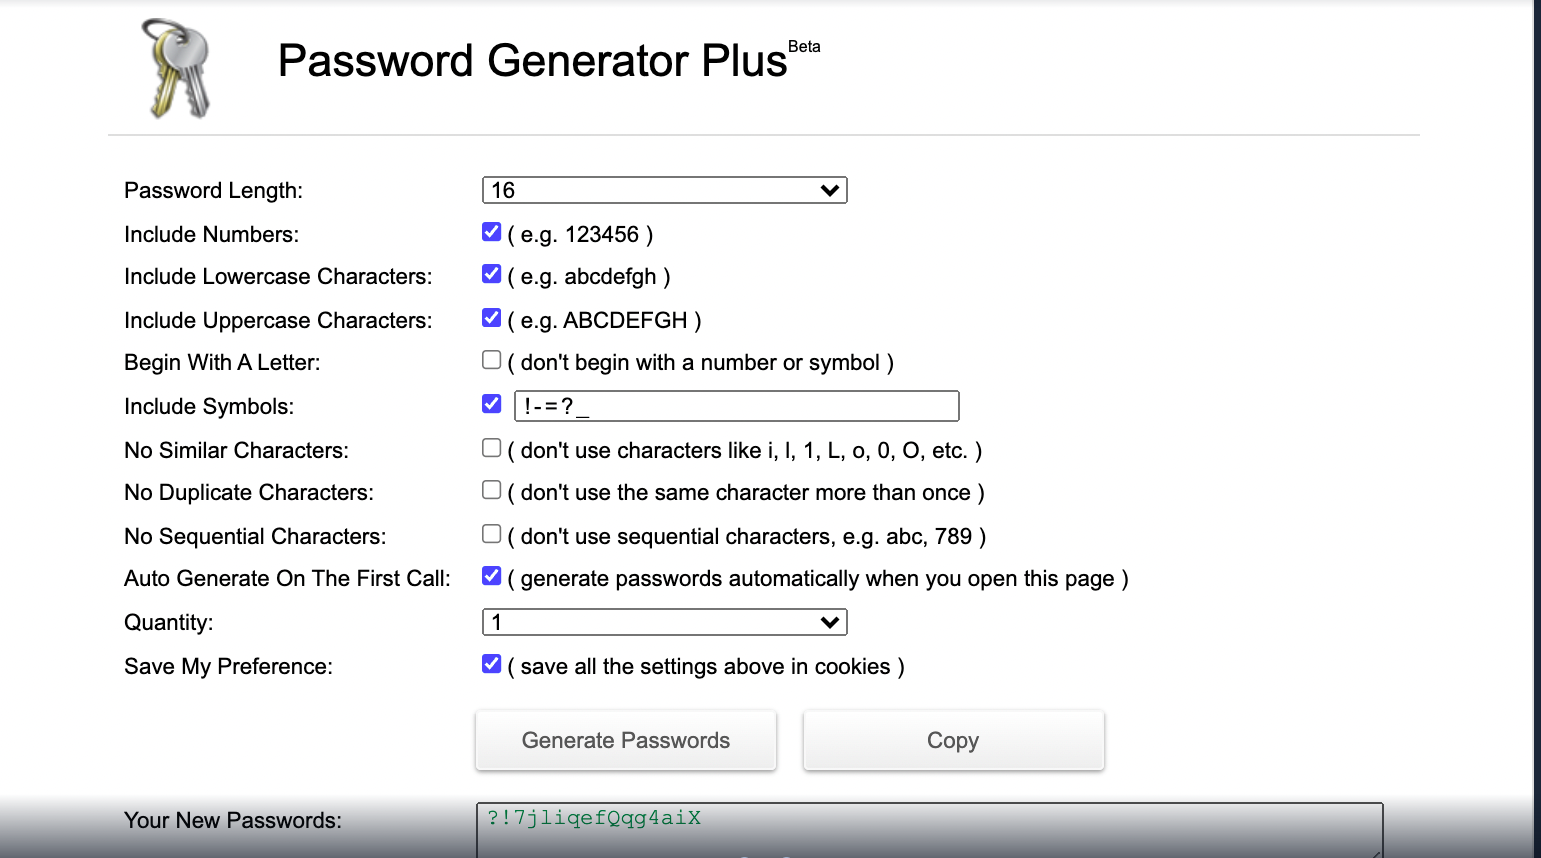
- Please use this link to generate a strong password for the parameter
cf_dbUserPassword. - Password generator settings should be as in the below image. this will have to be done once per browser after that it will save in browser cache.
Troubleshooting
Below are the Steps to debugging the errors in stacks.
- if job fails in any step then first check console logs of job and analyse the issue.
- If job fails in stack validation and any other syntax error the check the console logs & analyse the issue & fix it.
- If job fails in stack creation then check cloudformation console logs and analyse the issue & fix it. Here are the cloudformation console link Cloudformation Console
- Check for your brandName stack in cloudformation console and go to events and resources of stack to check the errors.